Oransi Air Purifier Filter Replacements Guide
Oransi offers easy maintenance to replace filters for our air purifiers, and we want to make these instructions as easy as possible for you. Below we’ve listed out step-by-step instructions on how to access and replace the filters, and other components, for each of our air purifiers.
Each Oransi device has an indicator light that signals when it might be time to change your air purifier filter. While there are ways to prolong the life of your filter through regular cleaning, it’s important to follow the directions below to check your filter. In general, we suggest purchasing new filters when you can no longer see white material on the filter.
Simply search for the device you own below to learn how to easily replace your filters and air purifier components to maintain fresh clean air in your home!
HEPA:
A red filter light will turn on to indicate it’s time to check your filters. This filter light is located at the bottom of the front of the device by the fan speed lights. The pre-filter should last the lifetime of the product if properly cared for and cleaned using a vacuum or damp cloth.
The HEPA media filter should last 12 months and should be replaced when it’s gray and you can no longer see white media. You can reset the filter light on your remote by holding down the “filter reset” button.
Do NOT use TrueCarbon filters in the AirMend purifier. If your purifier comes with HEPA (white) filters you have to continue using the HEPA (white) filter replacements.
Filter Access
- Turn off the air purifier using the remote. Unplug the device.
- Remove the front cover by pulling at the bottom of the cover away from the machine.
- Remove the mesh pre-filter covering the HEPA media filter. Take care not to damage the mesh.
- Remove the HEPA filter.
-
If the HEPA media filter looks dirty or is a gray color it should be replaced with a new filter.
How to Replace the Filters
Follow the steps above to remove the cover and access the filters. The filters should be installed in the same direction they were removed. Look for directions on the filter for proper installation.
- The HEPA filter has to be installed with the side labeled "Bottom" facing down otherwise the machine may not power on.
- Place the mesh pre-filter to cover the main filter.
- Place the front cover back on by pressing in the four corners. Do not press in the center of the front grill cover.
- Plug the purifier back in.
-
Turn on the device with the remote and set it to your desired fan speed.
Reset the Filter Replace Indicator
To turn off the filter check light after replacing your filter, point the remote control at the light and press and hold the filter reset button for 4 seconds.
How to Know if You Need to Replace Filters
Carbon:
A red filter light will turn on to indicate it’s time to check your filters. This filter light is located at the bottom of the front of the device by the fan speed lights.
The TrueCarbon™ filter should last 12 months and then should be replaced with a new filter. You can reset the filter light on your remote by holding down the "filter reset" button.
Do NOT use AirMend filters in the TrueCarbon purifier. If your purifier comes with carbon (black) filters you have to continue using the carbon (black) filter replacements.
Filter Access
- Turn off the air purifier using the remote. Unplug the device.
- Remove the front cover by pulling at the bottom of the cover away from the machine.
- Remove the carbon filter.
How to Replace the Filters
Follow the steps above to remove the cover and access the filters. The filters should be installed in the same direction they were removed.
- Place the new carbon filter into your purifier.
- Place the front cover back on by pressing in the four corners. Do not press in the center of the front grill cover.
- Plug the purifier back in.
-
Turn on the device with the remote and set it to your desired fan speed.
Reset the Filter Replace Indicator
To turn off the filter check light after replacing your filter, point the remote control at the light and press and hold the filter reset button for 4 seconds.
How to Know if You Need to Replace Filters
The EJ device should remind you to check your filters (the separate high efficiency air filter and activated carbon filters) every year after your purchase, and though the device has been retired we still offer the replacement filters for the EJ!
Filter Access
- Grab the handle near the top of the cover.
- Pull the cover from the top toward you. The cover will hinge at the bottom.
How to Replace the Filters
Follow the steps above to remove the cover and access the filters.
- Replace the filters. The high efficiency air filter should be installed with the rubber seal facing in.
- Close the cover and ensure it is completely closed. If the cover is not fully closed the air purifier will not power on.
- Plug in the air purifier and press the power switch in the back to "On".
- Adjust the fan speed to the desired speed. It may take a couple of seconds for the fan to begin spinning.
Reset the Filter Replace Indicator
Press and hold the Filter Reset button beneath the flashing light for a few seconds. The light will turn off and the filter counter will reset.
The Erik device should remind you to check your filters (the pre-filter combination or separate filters) every 1 to 2 years after your purchase, and though the device has been retired we still offer the replacement filters for the Erik!
Filter Access
- Unhook the 4 clips at the bottom of the unit.
- Pull the top completely off to access the filters.
How to Replace the Filters
Repeat the steps above to access the filters of your Erik device.
- Take out the pre-filter once you’ve removed the cover.
- The main is located under the pre-filter. Take out the main filter if it needs to be replaced at the same time as the pre-filter.
- Put the new main filter replacement into the device.
- Put the new pre-filter on top of the main filter.
- Put the top cover back on and secure the 4 clips back into place at the bottom.
Reset the Filter Replace Indicator
Press and hold the Filter Reset button beneath the flashing light for 10-15 seconds. The light will turn off and the filter counter will reset.
Your Finn device should remind you to check your filter and UV lamp every 1 year after your purchase, and though the device is retired we still offer the replacement filters and UV lamp for the Finn!
The Finn device also has a UV lamp, we suggest that you check the UV lamp from the UV view window. If the UV lamp still lights, it doesn’t need to be replaced yet.
Filter Access
- Turn Off and unplug the unit.
- Press the Lock & Release Button then remove the rear cover from the unit.
How to Replace the Filters
Repeat the steps above to access the filter and UV lamp and follow the directions below to replace the pre-filter, high efficiency air filter, and UV lamp.

- Remove the pre-filter from the rear cover and replace it with a new filter.
- Remove the high efficiency air filter.
- Use a screwdriver to remove the two screws and detach the UV lamp cover. Here is a helpful video on how to replace the UV lamp.
- Grasp the UV lamp and pull it straight out from the lamp socket. We recommend reaching in toward the base since it is easier to remove from here than pulling on the end of the lamp.
-
Take a new UV lamp and insert it into the lamp socket. Simply press in on the end of the glass lamp to snap into place. Re-install the UV lamp cover (the large metal face should be above the UV lamp and align the two screw holes with the back of the air purifier), then replace it with the new high efficiency air filter and new pre-filter and rear cover.
Reset the Filter Replace Indicator
UV LAMP RESET FUNCTION:
If the UV lamp needs to be replaced, the UV icon on the LCD will illuminate and flicker. After replacing the UV lamp, reset the UV lamp by pressing the UV Button for a few seconds, the UV icon will stop flickering and the new UV lamp will start to work.
FILTER RESET FUNCTION:
If the filter needs to be cleaned, the Reset icon on the LCD will illuminate and flicker. After cleaning the filter, RESET the filter by using a pin or paperclip to press the RESET Button, then the icon will stop flickering.
Your Max air purifier should remind you to change your filters (a pre-filter, carbon activated filter, and high efficiency air filter) every year after purchase, and though the device has been retired we still offer the replacement filters for the Max!
Filter Access
- Using the front cover removal tool, or any non-conductive item such as the handle of a plastic utensil, a wooden chopstick, or similar item can be used in place of the tool provided with your unit. Insert the tool into the uppermost side air intake slot and gently push outwards against the back surface of the front cover until the top corner of the front panel ‘pops’ free.
- Repeat this process for the other side and then lift the entire front panel up and away from the main body, exposing the filter compartment. Place the front panel out of the way and protect it from damage.
- Pre-filter: Turn the 4 locks per the direction of the arrows to release the pre-filter.
- High Efficiency Air Filter: Hold the small ribbon and pull the filter out.
- Carbon Filter: Hold the small ribbon and pull the filter out.
How to Replace the Filters
Repeat the steps above to access the filters of your Max device.
- Carbon Filter: Put the filter in place from the bottom and then push it into the cabinet.
- High Efficiency Air Filter: Put the filter in place from the bottom and then push it into the cabinet.
- Pre-filter: Place in the pre-filter and turn the locks to secure it.
- Front cover: Secure the interlock at the bottom first and push the whole cover inwards at the top two corners to secure it.
Reset the Filter Replace Indicator
After maintenance, press the buttons Fan Speed and Anion simultaneously until you see CL for Clear on your control panel. Please note that whenever the Fan Speed and Anion buttons are pressed at the same time, the counter will be reset. If users do not reset the counter after checking the filter or forget to check the filter after 3,000 hours, Check Filter will blink after 3,500 hours as a reminder.
Mod+ Manual / Mod Manual / Mod Jr. Manual
How to Know if You Need to Replace Filters
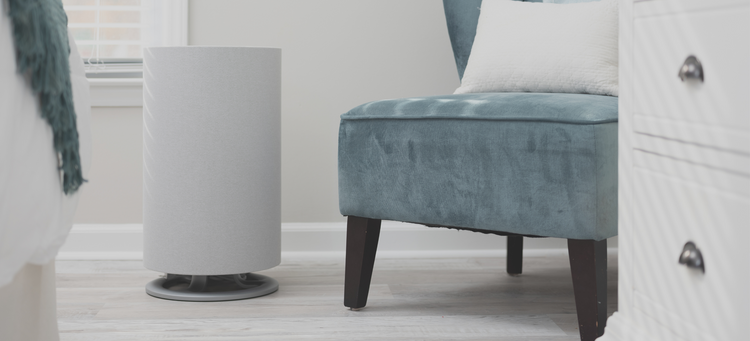
On the Mod series, the red filter replacement indicator light will turn on about every 12 months after purchase depending on your use. The Mod+, Mod, and Mod Jr. air purifiers have one combination filter that includes a mesh pre-filter, HEPA filter based media that is pleated, and activated carbon making maintenance a breeze!
Filter Access
- Turn off the air purifier using the power button on the touchscreen. Unplug the device.
- Carefully place the air purifier upside down on a non-scratch surface, such as carpet, with the base facing up.
- Unlock the base by moving the slide switch to the right of the lock in the unlocked position.
- Turn the metal base of the air purifier counterclockwise to loosen.
- Lift off the base of the air purifier to access the filter.
How to Replace the Filters
Follow the steps above to remove the cover and access the filters. All of our used filters can be placed directly in the trash. The filter should be installed the same way as the first filter, with the handle facing toward you.
- Pull the handle of the air filter to discard and replace it with a new filter.
- Place the air purifier base back on the device. Line up the arrow on the device with the arrow of the base (near the “Close”). Turn the base of the air purifier clockwise to tighten until the arrow on the base is lined up with the line near “Open”.
Here is a helpful video showing how to set up your Mod and how to replace the filter. The Mod+ and Mod Jr. devices work in the same way.
Reset the Filter Replace Indicator
Press and hold the Filter Reset button beneath the flashing red light for a few seconds. The light will turn off and the filter counter will reset.
How to Know if You Need to Replace Filters
Your OV200 air purifier should remind you to change your filters (combination pre-filter and high efficiency air filter, and carbon activated) about every 6-9 months after purchase, and though the device has been retired we still offer the replacement filters for the OV200!
Filter Access
- Ensure the air purifier is turned off and unplugged.
- Pull the front cover from the bottom towards you and lift it up.
- There are two swivel tabs at the top of the filter that hold it in place. Slide these so you can access and remove the filters.
How to Replace the Filters
Follow the steps above to access the filters of your OV200 air purifier.
- Install the carbon filter first and then the filter with the foam side facing you.
- To place the cover back on, insert first at the top. There are four openings where the tabs from the top cover are placed. Rotate the cover to seat it at the bottom.
Reset the Filter Replace Indicator
When the purifier has run for a total time of 2,000 hours, the maintenance indicator illuminates as a reminder to check the filter — when it is a dark grey, replace it as soon as possible. After maintenance press the “Filter Reset” button to reset the counter.
The Filter Reset Button is touchy. Use your thumb and press the reset button. As you’re applying pressure, rotate your thumb back and forth to hit the sweet spot to reset. The reset light will go out when it is reset.