Natural Ventilation: Cost-Effective and Energy-Efficient Home Cooling
This goal, while well-intentioned, has unfortunately made indoor air quality a greater concern. This is because when a house is air-tight any dust, chemicals, dander, and other types of indoor air pollution are trapped inside.
To create cooler homes without sacrificing air quality, many people turn to natural ventilation, which is the process of moving air throughout the home without a fan or other mechanical systems.
Sounds like opening a window, right?
While the principles at play are very much the same, we’ll demonstrate that a natural ventilation system is more than just a few open windows...
Natural vs Mechanical Ventilation: Meeting Two Specific Goals
When considering air-cooling and temperature control options for your home or facility, there are two broad categories of systems you can use.Most people use mechanical ventilation, also called forced ventilation, which would include air conditioners, box fans, and whole house fans. The common factor is these systems use mechanics of some kind to change or move air. They are usually connected to the home’s electrical outlets.
Natural ventilation, however, does not use mechanical systems. So why would you choose to cool your home with natural ventilation? It comes down to two specific goals.
Energy Efficiency
The primary reason for using natural ventilation over mechanical ventilation is energy efficiency.Because natural ventilation does not require energy use through motorized fans, there is less energy use. In fact, for almost all systems, there is literally no energy use; the system provides comfortable air while being completely passive.
Energy efficiency, however, is not automatic when using natural ventilation. Natural ventilation needs to be used in a strategic fashion to be efficient. When used properly, however, it can help reduce energy consumption and utility bills for home and businesses.
Indoor Air Quality
Another advantage of natural ventilation is better indoor air quality. With mechanical air ventilation, the air essentially stays inside the house.For example, an air conditioning unit can cool the air and circulate it through the home, but it won’t push indoor air pollutants outside like natural ventilation. Natural ventilation provides fresh, healthy air for the indoors.
Disadvantages of Natural Ventilation
The main problem with natural ventilation is that you can’t control the driving factors. With a fan, you can set it to high, medium, or low, or you can simply turn it off. With an air conditioner, you can set the temperature to the exact number you prefer.With natural ventilation, however, the driving factors are outdoor winds, temperatures and humidity levels. You can’t change these factors, so the effectiveness of the system, as well as how often you can use it, depends entirely on the weather, and the perfect airflow rarely occurs for an extended period.
For obvious reasons, this makes the use of natural ventilation more effective in certain environments. Cold climates, for example, generally can’t use natural ventilation in the winter, reducing their overall effectiveness.
The design of the building also matters. Unlike a switch on an air conditioning system, you can’t easily change the layout of a building, making it even more difficult to reach the ideal conditions.
Types of Ventilation
It might seem like a simple principle, but natural ventilation is not as basic as opening the windows. While open windows do, in effect, create natural ventilation, the concept refers to a form of intentional building and home design for natural ventilation, with specific features, that are intended to create better air flow.Cross (aka Wind-Driven)
Cross, or wind-driven ventilation, is the effect that occurs when you open the windows and allow the breeze to cool your home. When wind hits the side of the home, it creates a positive pressure against the wall, while negative pressure is created on the opposite side. If windows are open, the difference in pressure forces air through the building, creating natural cross ventilation.There are many variables that will affect the amount of air that is forced into the building. Wind speed, for one, will change the air that is being forced into the home; wind direction is also important. If the air is hitting the home at a direct angle, it will create better ventilation through the home.
The building layout will also affect the ventilation. The forms and dimensions of the building can change how well air flows into the interior, and window shape and size will also make a difference.
Stack (aka Buoyancy-Driven)
The other type of natural ventilation is called stack or buoyancy-driven ventilation. Instead of having openings on either side of the building, this type has openings low and high vents. With stack ventilation, you are relying on the temperature differences between air inside the building and air outside to create air movement.With stack ventilation, you have an opening at the bottom and top of the facility or house. Assuming the air is cooler outside, the outdoor air will flow in and the warm air, because of buoyancy, will rise. This naturally creates an upward flow as the warm air escapes through the top and is replaced by cool air at the bottom.
When designing a facility for stack ventilation, there are many factors that should be considered. The inlets should be low, allowing the fresh air to cool as much of the room as possible. The best placement for outlets is high up on the opposite wall, creating nearly complete air flow. (If the inlet and outlet are on the same wall, the opposite side of the room won’t receive as much air flow.)
The benefit of stack ventilation is that it is not entirely dependent on wind. Because buoyancy is the driving force, the system will continue to provide air ventilation even if wind is not present.
Designing Considerations: Creating Better Ventilation and Comfort
When designing a home or business for natural ventilation, it’s not enough to simply add bigger windows. Instead, you need to think strategically to create a more effective facility.First, you can look to the outside area. Don’t crowd the intake area with bushes, trees, fencing, or other obstructions that will impact inward airflow. It’s helpful to have inlet and outlet areas on opposite sides and, if using stack ventilation, as low and high as possible.
When building the home, it helps to have the inlets located on the side of the house that will receive the most wind. Depending on where you live, this will often be along the northwest side of the building, which gives the best chances for direct airflow during the summer.
Because the goal of natural ventilation is to provide cooler interior temperatures, it helps to take steps that reduce heat gain. Using old-fashioned techniques like shady trees to reduce sun exposure on walls and roofs certainly helps, but you can also implement measures such as light-colored building materials and paints.
How you arrange the home can also make a difference. Make sure the inlets are not covered by furniture or home accessories, as this will obstruct the flow of air, and try to avoid overloading the rooms with furniture. Think of the air flow as a river and furniture as large boulders. A few large boulders won’t stop the river from flowing, but they will slow it down. Put in too many, and you eventually create a dam. Giving an open space, however, will increase the chances of swift and consistent flow.
Technologies to Increase Ventilation
Solar Chimneys
Solar chimneys are systems that use the convection of air through solar energy. The system consists of a home or building, a tower with vents at the top, and underground piping that pulls outdoor air into the home.Air starts at the exterior pipe and flows underground, where it is cooled as it passes through the underground structure. The cooled air then flows into the home, creating a cool living space.
To force the air flow, the structure has a chimney that is usually painted black to heat the outgoing air. The air in the chimney is warmed, forcing it upward where it is released. This creates the movement of air required for ventilation.
Solar Attic Fans
While technically not a pure form of natural ventilation, a solar attic fan can cool your attic space without the need for electrical power. The power source for the fan is from the solar panels that are part of this system. This basically works by pulling the heat from your attic so your home no longer has a heat source in the attic space.Wind Towers
Also called wind catchers, a wind tower is a type of structure that has been used since the ancient Egyptians. These are essentially buildings with multiple openings on specific sides of the structure. They have a tower with vents at the top, which creates a stack-ventilation effect.One of the interesting components of wind towers is that they are often connected to a qanat, which is an underground canal. Through pipes, outside air flows into the qanat, is cooled against the water, and flows upward into the wind tower, creating a cool living space.
Trickle Ventilators
Trickle ventilators are a type of opening that is very small, allowing a slight amount of air to enter the facility. They allow for natural ventilation when other elements, such as windows and doors, are sealed. The goal with trickle vents is to allow for natural ventilation when outside temperatures are cold.Air Purifiers and Natural Ventilation
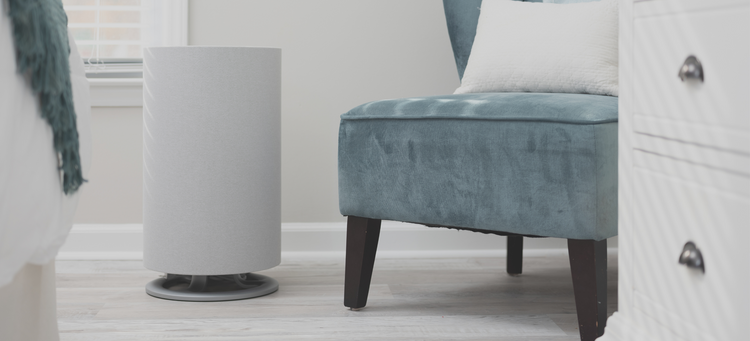
Natural ventilation can be effective for moving harmful chemicals and dust to the outdoors, but you may still need an air purifier to improve the air quality in your home.If you are using an indoor air purifier while using natural ventilation, it’s best to place the purifier somewhere near the inlet so it can clean the air as it enters the home. If you place the purifier near the outlet, you may simply be cleaning the air that you release outside. (Unless your home is a smog-spitting factory, you probably don’t need to purify the air that leaves your house!)